User Management
A User can store all the visual and technical information on how a user has set up and constructed the Analyzer with various views (templates), channel colors, channels groups and the different setting of plots and exports.
Important
Whether user management can be used at all depends on the respective licensing of the software. With the R&D, NET and TEAM licences, user management and therefore an unlimited number of different users can be created.
Working as different users is very useful for organizing the 2D-Software Analyzer when multiple people are working on one only one computer with 2D-WinARace installation.
Also, for an individually used computer it is very useful to create different users which are covering different topics (Suspension, Engine, GPS, …).
Important
Users can be deleted, renamed, copied, and exchanged with other users.
Important
Users are managed by a Master-User.
Important
At new WinARace-installations, users from previous installations can be imported at installation!
Enabling User Management
If user management is enabled the following Analyzer login window is shown when opening the Analyzer from WinARace.
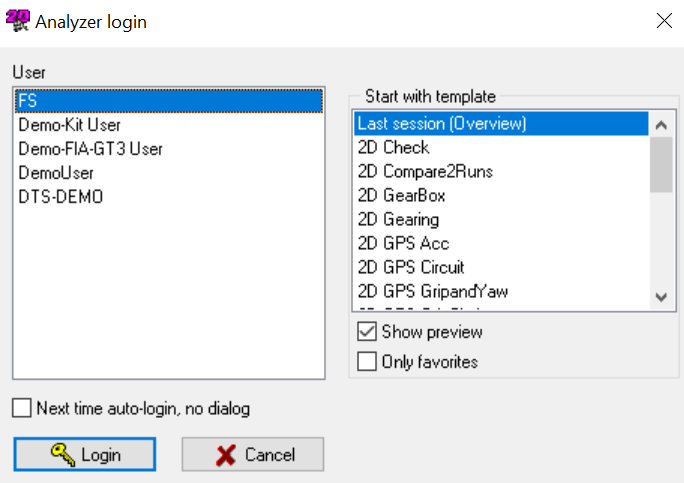
User Menu
Important
User management can be disabled only by Master-User by ticking the box Next time auto-login, no dialog
To enable User Management in Analyzers tab Settings the selection User management must be clicked to open the following window and set tick-box Multi User:
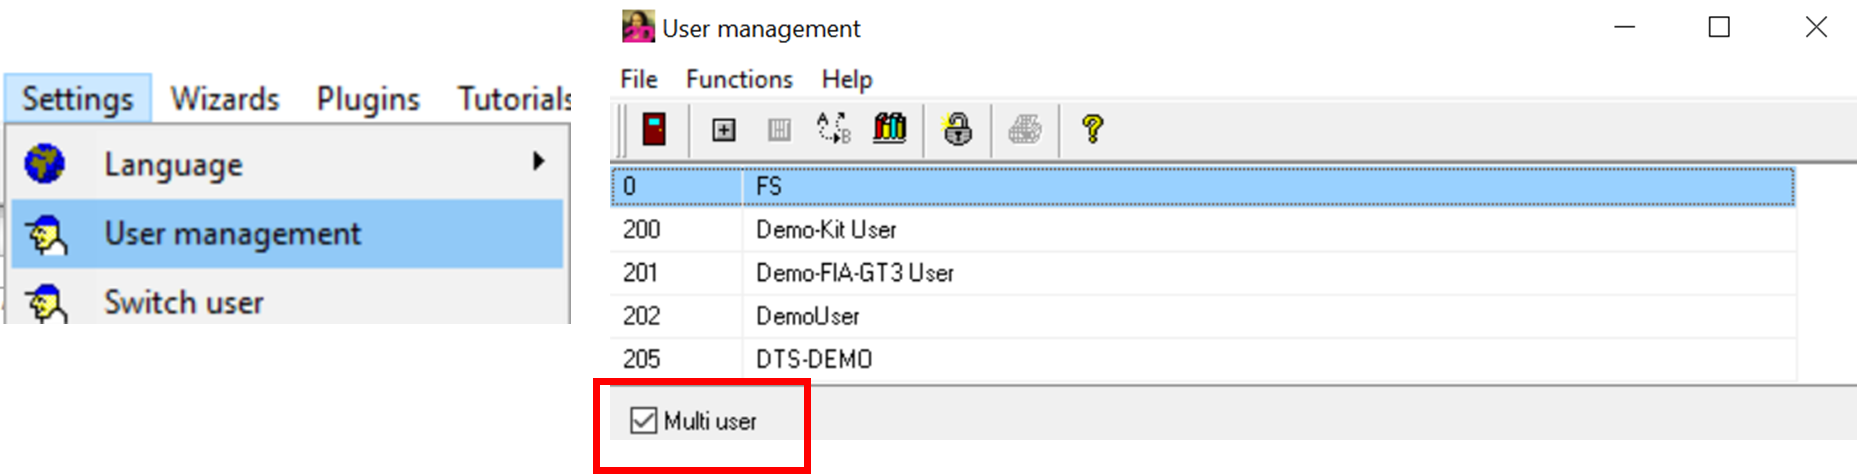
Enabling Multi User
To disable User Management or add or delete users via the Analyzer, the Master-User (normally first in list) must be used when opening the Analyzer.
Otherwise, the User management selection in Analyzer-tab Settings is not available.
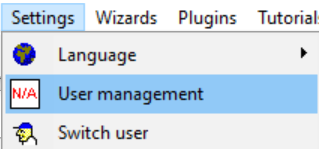
User managment not available
Important
Master-User is the user which User0 (please see figure at next page)
User Management in Browser
Open WinARace and open Folders - Protocolls folder via WinARace-Tab Settings and open user data directory by clicking on the button with respective path
Important
Instead of opening Folders – Protocolls also shortcut [CTRL]+[ALT]+[U] can be used with WinARace opened!
In directory Users the different users are stored:
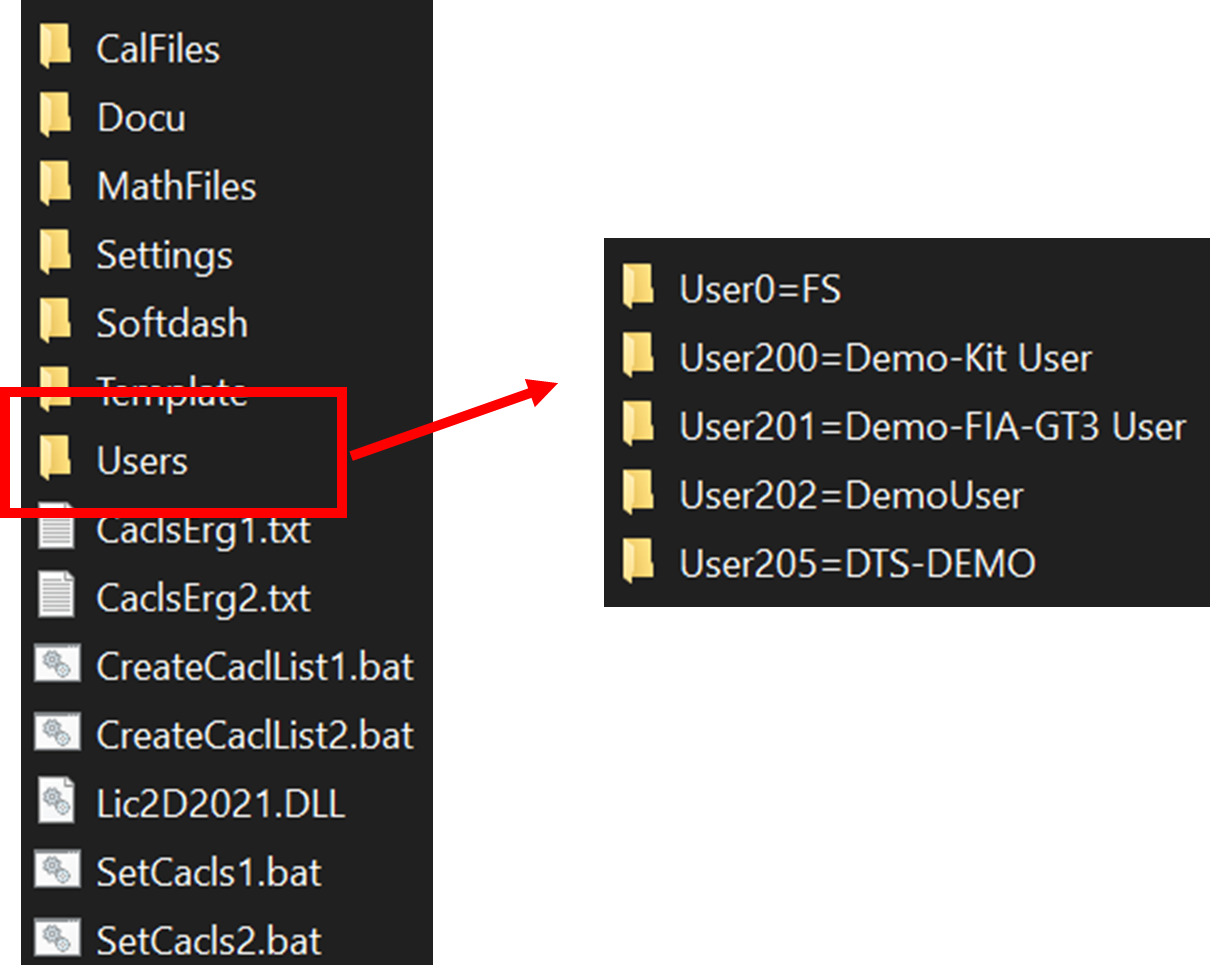
User directory
Important
Master-User in this example is User0=FS
Manual User settings backup
With 2D Software it is possible to copy all User settings of a WinARace installation to a synchronizing directory, such as a server or a USB stick.
The upload to a server or USB stick can either be used as a backup functionality or to share/copy User settings to other PC.
Each time a 2D module is read into WinIt or the setting is sent to the module via apply, the current setting of the module is saved in a WinARace directory to ensure that it is always possible to step back to an older, correct setting of the module.
Beside the module’s settings, also and especially the Analyzer templates (with plots) are included at the User settings.
In this manual it is described how a backup of User settings can be prepared and executed via toolbar button.
Attention
When the backup is executed, only newer files are overwritten and not all files are copied again!
In addition to the option of executing the backup each time by clicking on the button in the toolbar, the software can also be automated so that the backup is run automatically on a regular basis. The days between automatic backups can be freely selected.
The procedure of integrating backed up User settings on a new PC is described in an additional manual.
Preparations
Open WinARace on the PC to be backed up and under Help → Search for software updates update the software to the latest version
Open WinARace on the PC to be backed up and set the synchronizing directory (e.g. USB stick or server directory where you want to copy your settings to) under WinARace → Settings → Folders protocol → Settings synchronisation directory.
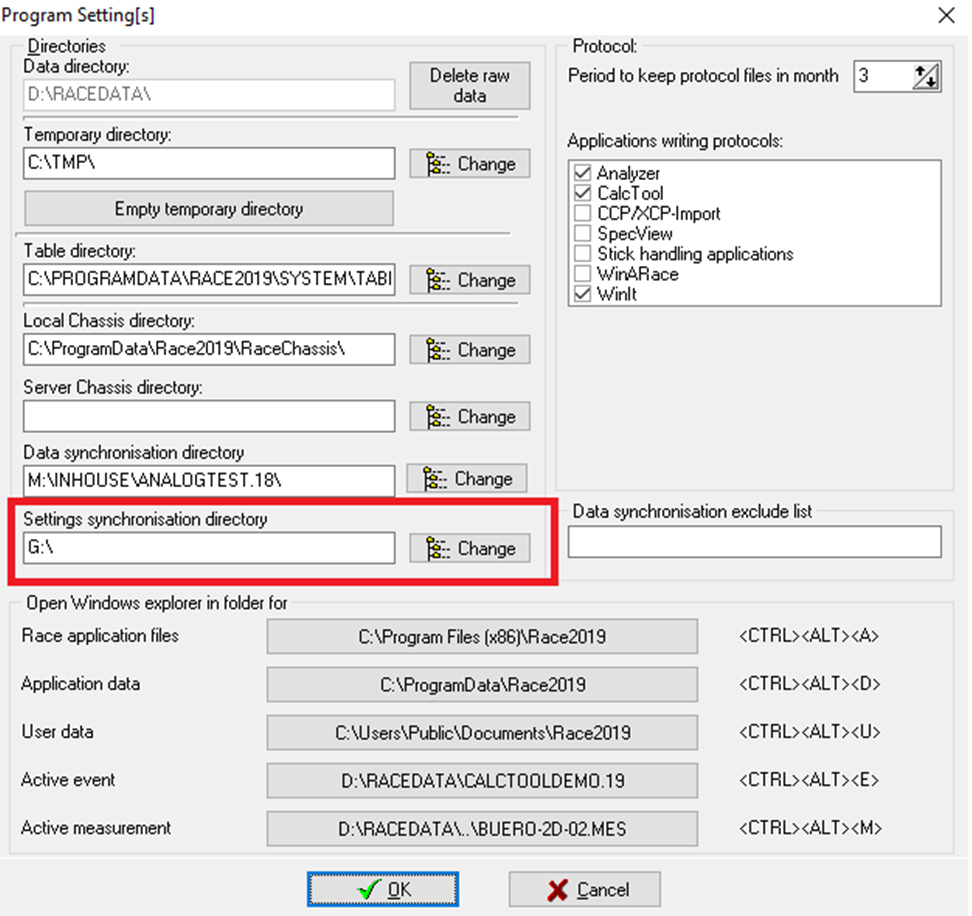
Settings synchronisation directory
Important
In this selected directory all required settings for running your software on another PC are copied to.
Important
The copied directory structure will consist of your current PC-user name and the used Race20__-Softwarename.
Execute User settings backup
Press the “Start Batchfile to Copy 2D Software Settings to another Device” button in the WinARace toolbar (see Figure 2). The call starts the Windows command prompt (see Figure 3). To start the upload, follow the instructions at the command prompt (press any key).
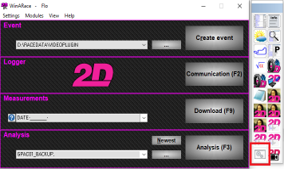
WinARace with toolbar
Important
In newer WinARace installation a new toolbar icon is used for User settings update
New toolbar icon
The folders shown in following figure were automatically created by executing the batch file in the previous step at the location selected in the “Preparations” step.

Auto User setting backup
With 2D Software it is possible to copy all User settings of a WinARace installation to a synchronizing directory, such as a server or a USB stick.
The upload to a server or USB stick can either be used as a backup functionality or to share/copy User settings to other PC.
Each time a 2D module is read into WinIt or the setting is sent to the module via apply, the current setting of the module is saved in a WinARace directory to ensure that it is always possible to step back to an older, correct setting of the module.
Important
In this manual it is described how how to set up and enable automatic user setting backup.
Open WinARace and check if toolbar already contains the button for Start Batchfile to copy 2D software settings to another device
Open WinARace and open Folders - Protocolls folder via WinARace-Tab Settings and open Application data directory by clicking on the button with respective path
Important
Instead of opening Folders – Protocolls also shortcut [CTRL]+[ALT]+[D] can be used with WinARace opened!
Open Race.ini with a text editor
Close all currently running 2D applications on your computer
Important
It is very important to close all currently running 2D applications that the .ini-files are saved correctly at next steps!
Insert the following group at an arbitrary position (but after another [group] is finished) of Race.ini and enter the desired update frequency in days (e.g. 10)
[AutoClickToolbarButton]

Count=1

ToolProg\_1=2D\_COPY\_RACE\_SETTINGS\_TO\_SERVER.BAT

CheckFreqInDays\_1=10

LastCheck\_1=
Save and close Race.ini file and open WinARace again
When all settings are done correctly the user is now queried to execute the user settings update
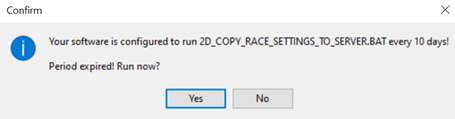
Query for automatic user backup
Integration of user settings
At this step, the backed-up user settings are imported to new software installation (e.g., on new computer).
Open WinARace on the new PC and under Help → Search for software updates update the software to the latest version.
The folders shown in Figure 1 were automatically created by executing the batch file with the manual User Management – User settings backup:
Figure 1: Folder in the selected settings synchronizing directory
AppData:
Open the synchronizing directory (see section “Preparations”) in Windows Explorer and copy all files of the application data directory AppData
([CTRL + A] → [CTRL + C])
- Open WinARace on a new PC and press [CTRL + ALT + D] to open the Race20_- folder in Windows Explorer (see Figure 2).
Paste the data copied in the previous step ([CTRL + V]), thus completely overwriting the previous application data
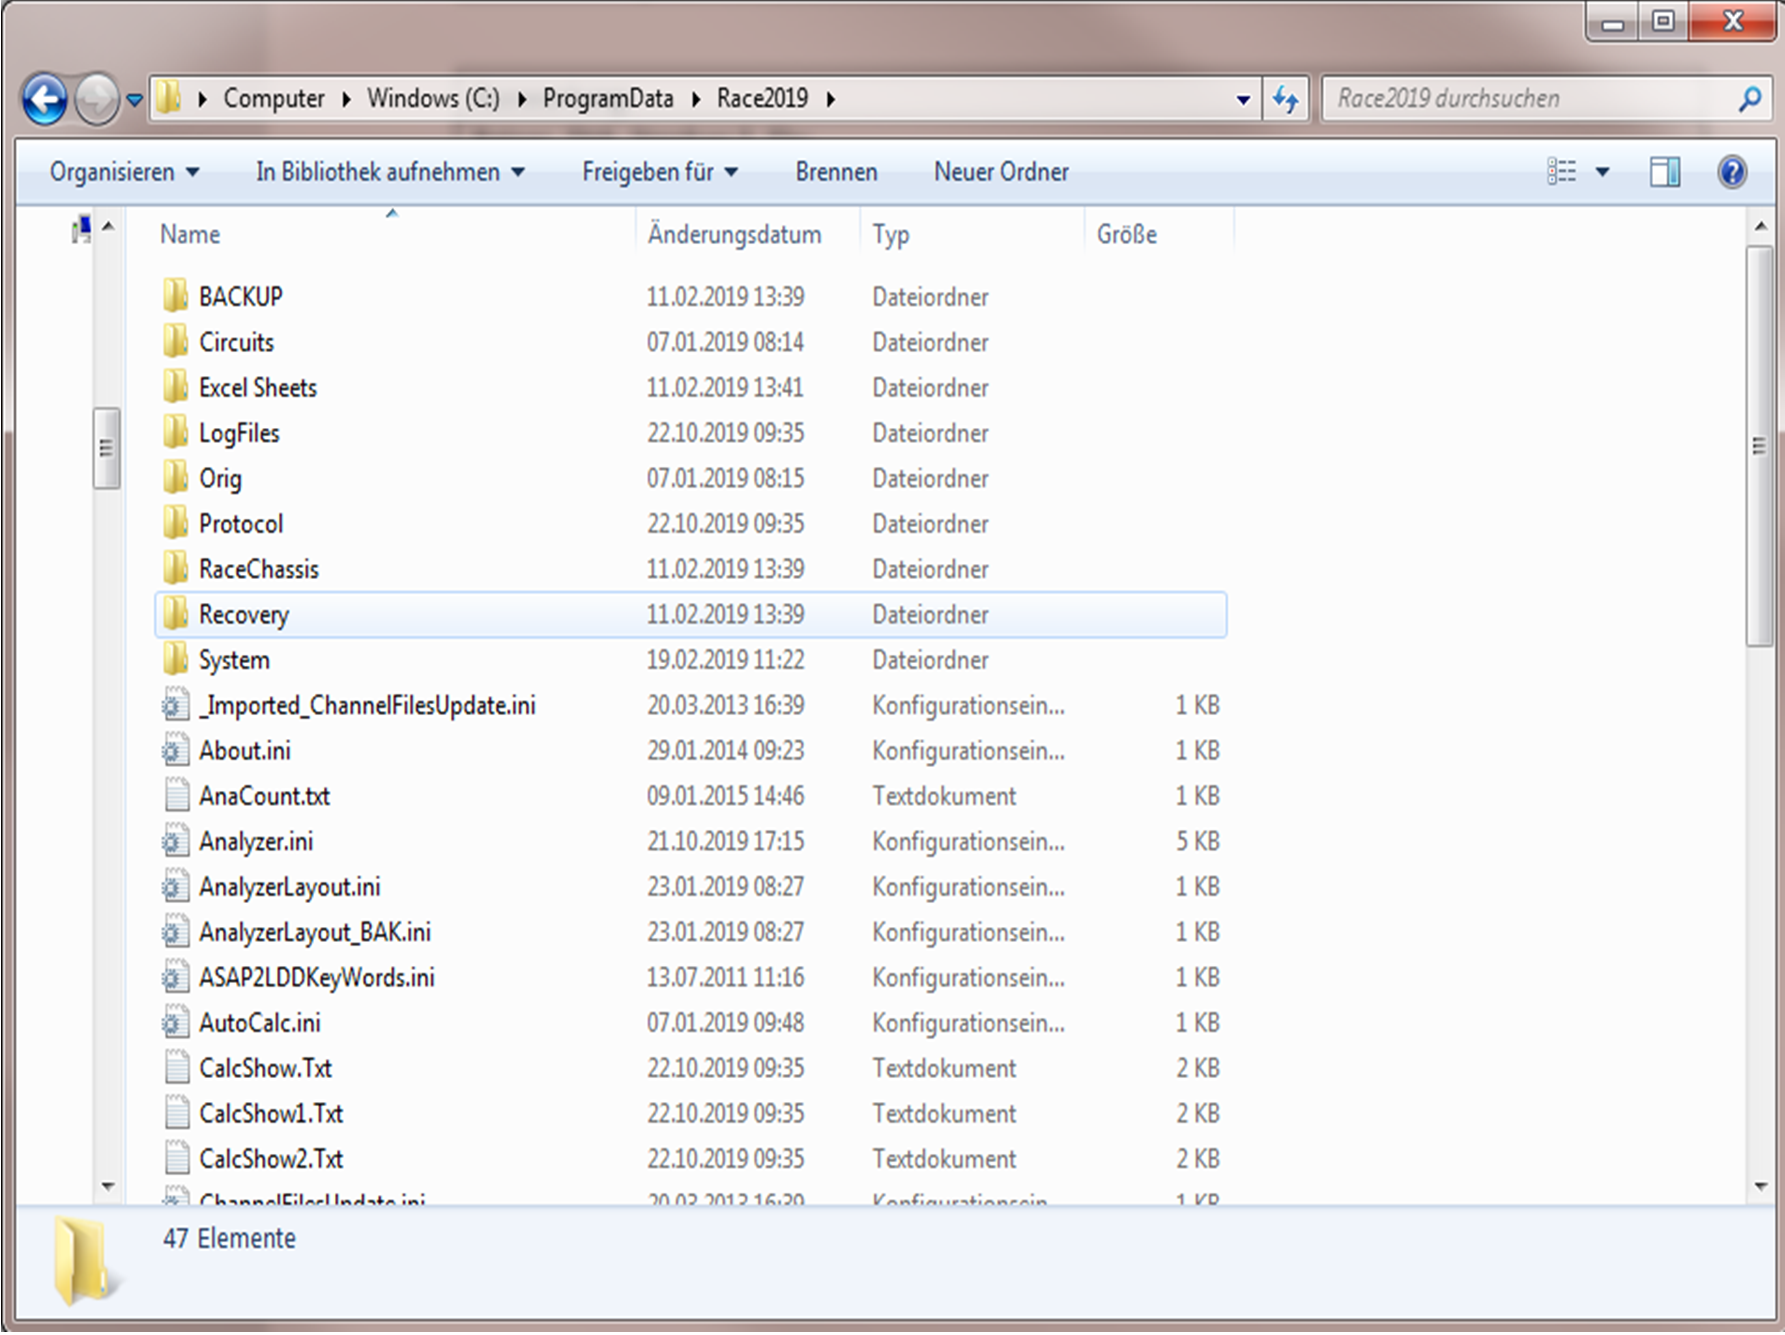
Figure 2: Application data directory
RaceData:
Open the synchronizing directory (see section “Preparations”) in Windows Explorer and copy all the files of the RaceData folder ([CTRL + A] → [CTRL + C])
Open WinARace on a new PC and press [CTRL + ALT + E] and *then go back one directory* to the RACEDATA directory (see Figure 3).
Now insert the data copied in the previous step ([CTRL + V]) and thus partially overwrite the previous data.
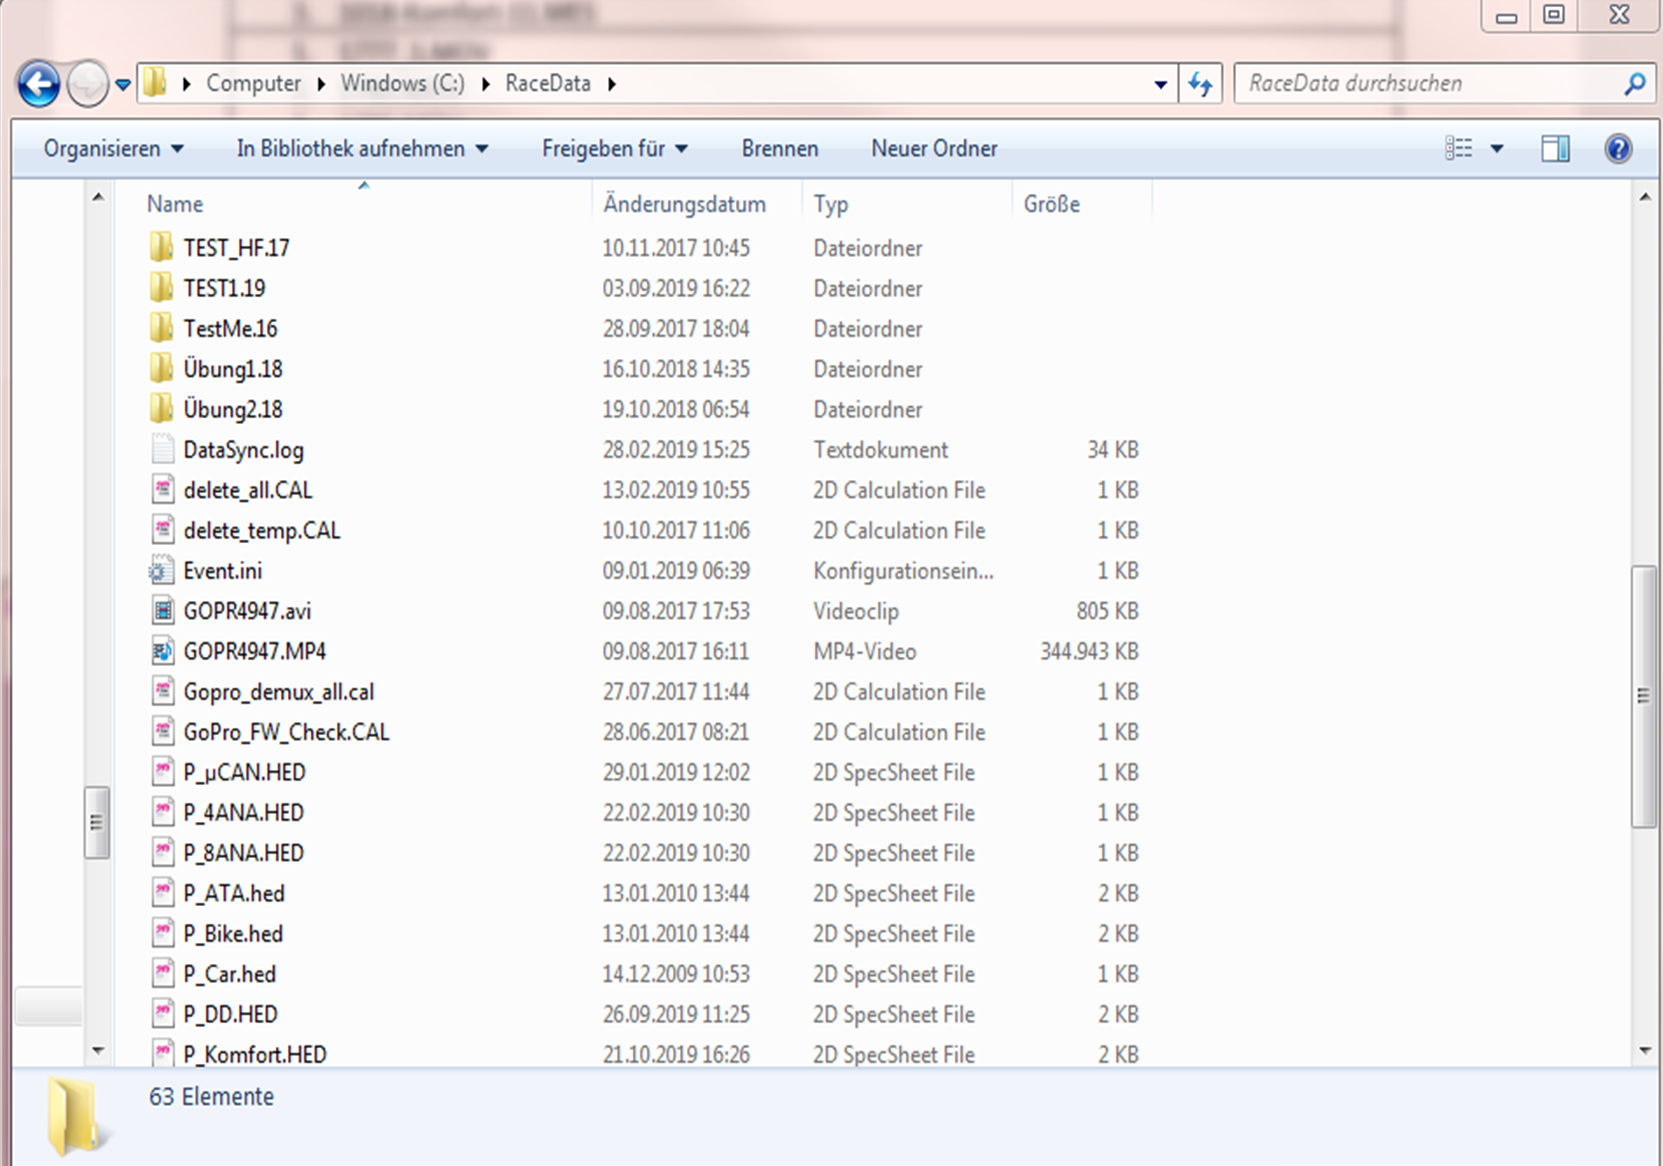
Figure 3: 2D measurement data directory
UserData:
At this step it must be distinguished between different license level. At R&D/NET/TEAM license levels a Multi-User-Mode can be enabled so the User-data must be copied to another folder then at other license level.
R&D/NET/TEAM license
To use the user settings on the new PC under the same user as on the old PC, a new user must be created on the new PC.
Open the synchronizing directory (see section “Preparations”) in Windows Explorer, open folder Users and copy the desired user directories (e.g. User2=fs)
On new PC open WinARace and press [CTRL + ALT + U] to open the Race20__-folder in Windows Explorer and open the folder Users and insert the previously copied user directory (e.g. User2=fs) into this directory (see Figure 4)
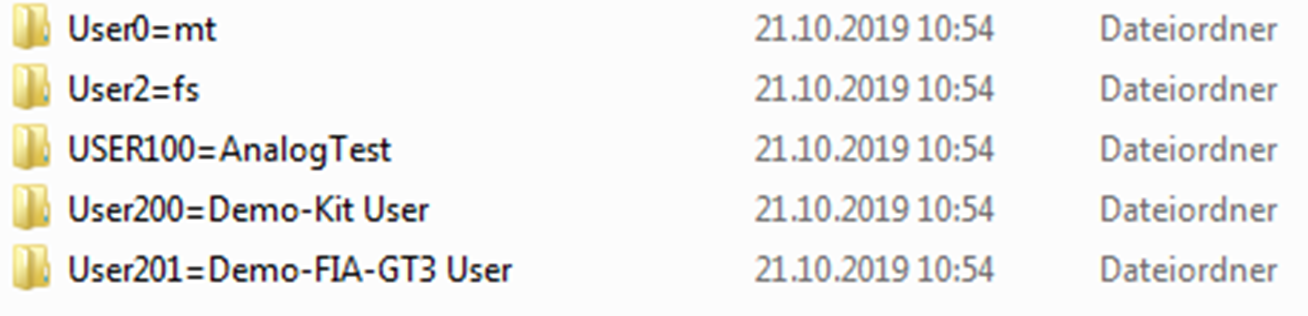
Figure 4: User directory
All other licenses
To use the user settings on the new PC as on the old PC, the user settings must be copied.
Open the synchronizing directory (see section “Preparations”) in Windows Explorer and copy all the files of the Settings folder ([CTRL + A] → [CTRL + C])
On new PC open WinARace and press [CTRL + ALT + U] to open the Race20__-folder in Windows Explorer and open the folder Settings and paste the data copied in the previous step ([CTRL +V]), thus partially overwrite the previous data.
The user settings of the backed-up users are now available on a new computer and stored measurement data can be applied.