Scripting
Scripting means that various Analyzer functions are executed one after another.
Example:
Executing CAL file 1
Executing CAL file 2
Displaying specific template only of fastest lap
Exporting data only of fastest lap as csv file
Important
Scripts are always executed from top to bottom
Important
Scripts can be started either from Analyzer menu directly, via WinARace toolbar button or via AutoCalc routine
When starting via WinARace toolbar, a script can be executed for mulitple in WinARace selected measurements for recalculating already done measurments.
Important
Scripts are used to automate the Analyzer
Create Script
Via menu Functions script menu can be opened.
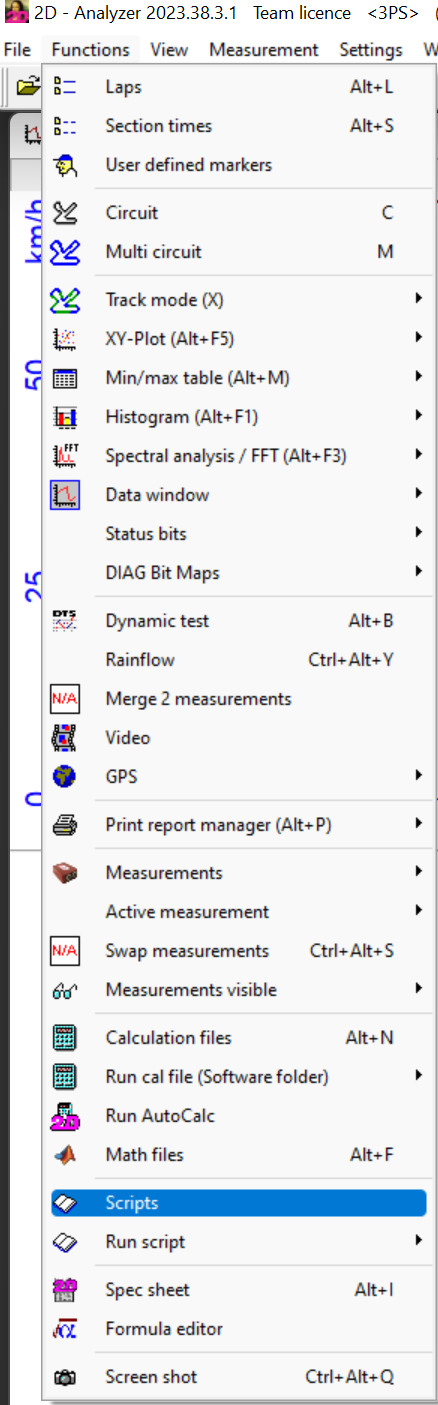
Open script menu
Via script menu all script settings can be done

Script menu
General:
Load: Load already created script
Save: Save current script
Important
when saving script, it can be chosen if it should be available only for current user or for all users!
New: Create new script
Close: Close script menu
Execute:
Run: Run script from action 1
Run from here: Run script from currenlty selected action
Step: Execute only currenlty selected action
Stop: Stop execution of script and jump to end of script
Rewind: Select action 1
Execution settings:
Beep after action: With activated checkbox, after each action of script a beep is made
Number of beeps when finished: Number of beeps (up to nine) when whole script was executed
No delays: With activated checkbox, actions are carried out without any time delay in between actions
Default delay for new actions [ms]: Delay between actions in [ms] when checkbox No delays is deactivated
Minimize on run: With activated checkbox, the script menu is closed during script execution
Error handling:
Stop script: When error appears during script execution, stop script and jump to end of script
Ask to continue: When error appears during script execution, a window is shown if script execution should be continued
Continue: When error appears during script execution, script is continued
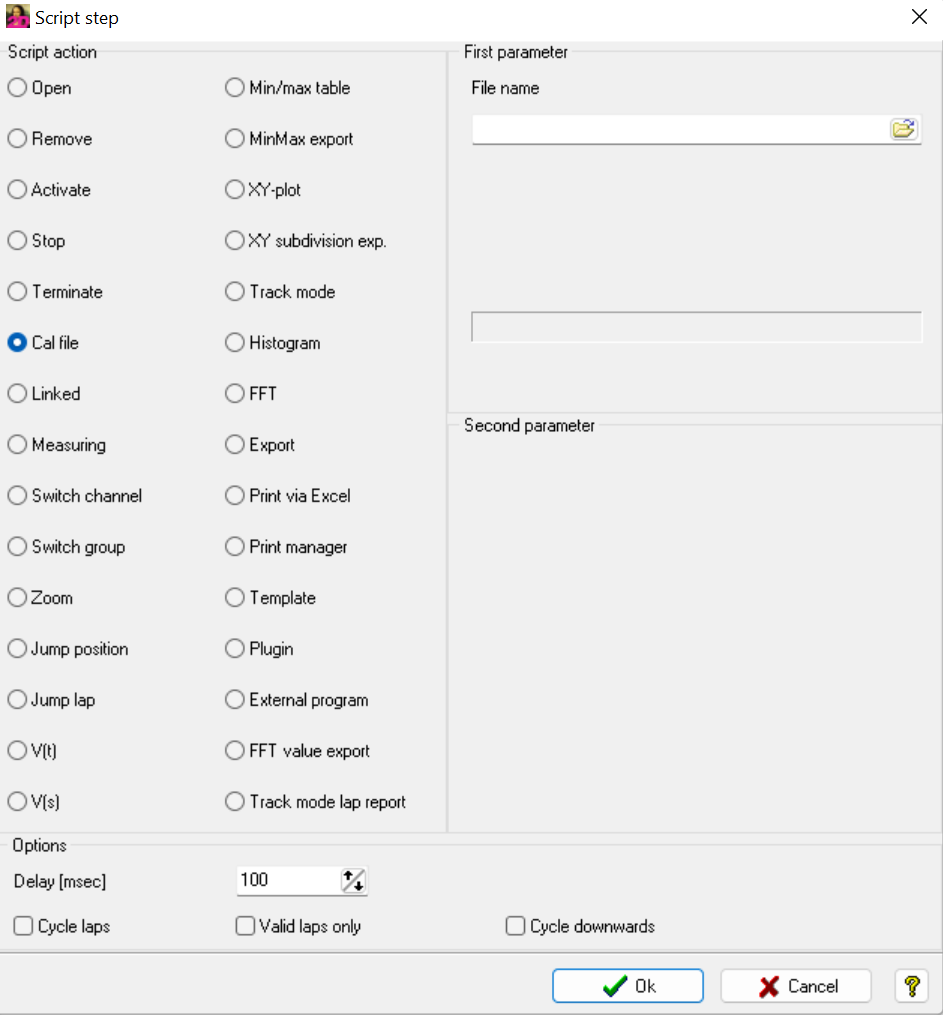
Create script:
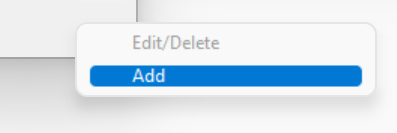
Insert: Insert new action
Edit: Edit selected action
Remove: Remove selected action
Edit Script
Script menu - Insert
Important
At some actions a path must be specified. All software placeholders can be used here!
Important
Script actions can be freely combined!
Open: Select measurement from File explorer to open in Analyzer
Remove: Select in list which measurement should be removed from Analyzer
Activate: Select in list which measurement should be activated in Analyzer
Stop: Stop script and jump to end of script (useful for testing the script)
Terminate: Close Analyzer
Cal File: Executing CAL file
Important
CAL file must be called with complete path at First parameter!
Linked: Link measurements togehter so they can be moved togehter
Measuring: If checkbox is activated the measuring mode is switched on
Switch channel: Switch one visibility of a channel to display in moving window
Switch group: Switch one visibility of channel group to display in moving window
Zoom: Zoom in/out measurement
Important
Depending on moving window axis in time or distance, the first parameter will define meters or seconds to zoom in/out
Jump position: currently not available
Jump lap: Jump to any lap (1-30) or to fastest lap (F)
V(t): Change moving window axis to time scale
V(s): Change moving window axis to distance scale
Min/Max table: Activate MinMax table for displaying. Checkbox in second parameter will make it visible in screen or close it
MinMax export: Export values of MinMax table (see example)
XY-plot: Activate XY plot for displaying. Checkbox in second parameter will make it visible in screen or close it
XY subdivision exp: Export XY plot subdivision
Track mode: Activate Trackmode for displaying. Checkbox in second parameter will make it visible in screen or close it
Histogram: Activate Histogram for displaying. Checkbox in second parameter will make it visible in screen or close it
FFT: Activate FFT for displaying. Checkbox in second parameter will make it visible in screen or close it
Export: Execute previously defined Export. Second parameter defines export file name and directory to export file
Print via Excel: Print any of the given possibilities listed under the second parameter (moving window, XY-plot, FFT, track mode or the whole overview). In the first parameter defines which Excel file is printed.
Important
Excel files to be printed must be prepared earlier and saved in the Race folder (depending on your version, Race 2023 for example: C:ProgramDataRace2023Excel SheetsAnalyzer)
Print Manager: Print a set of information configured in the print manager. Select the print manager settings file in the first parameter. Choose a print file name in the second parameter. This will copy an image of the print file into the chosen file
Template: Set template to be shown in moving window
External program: Start external program
Options:
Delay: Change delay time after execution of this step
Cycle laps:
Valid laps only: Takes only valid laps into account
Cycle downwards*:
Execute Script
Via Analyzer menu (single MES)
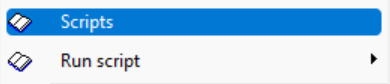
Start script via Analyzer menu Functions for currently in Analyzer loaded MES via Run script
Via WinARace toolbar (multiple MES)
At execution via WinARace toolbar, always the script is executed for the currently in WinARace selected measurement!
Important
When selection mulitple measurements in WinARace, the scrips is executed for all selected measurements one after another automatically!
Important
Thereby a lot of already available measurements can be recalculated automatically! So execution of a lot of measurements can also take serveral minutes/hours so start e.g. during night when 2D must not be used!
Add script to WinARace toolbar
By right-clicking on WinARace toolbar, a new button can be added
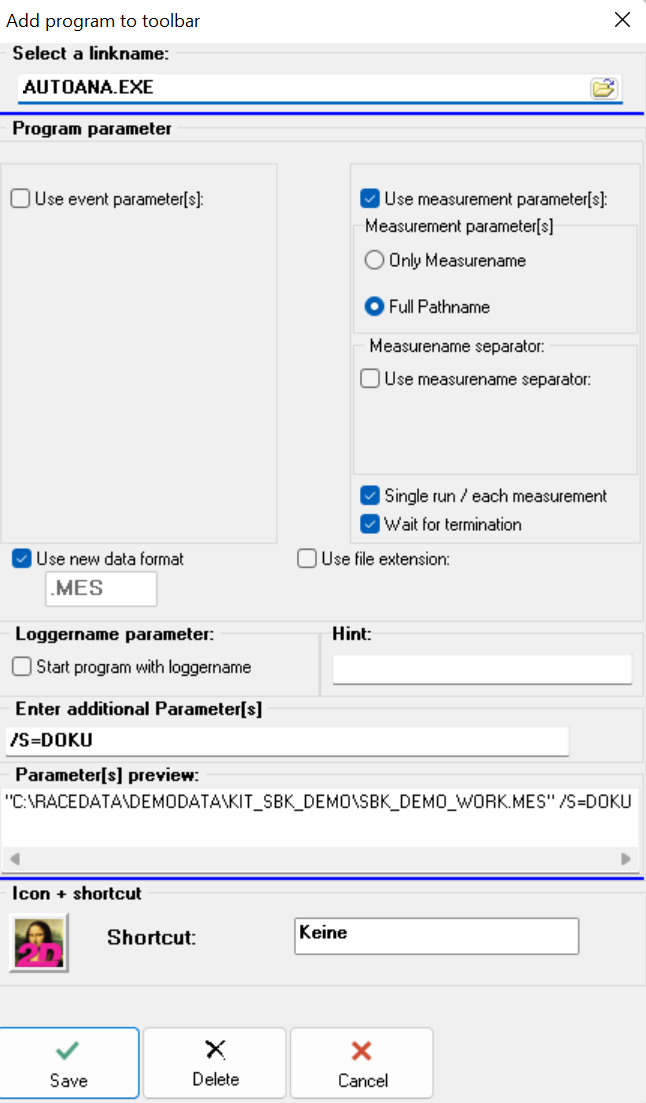
Toolbar setting menu
Select a link name: Select a program to execute script. Scripts are executed by 2D Analyzer. A sub-application of Analyzer called AutoAna.exe is especially designed for toolbar use, because with AutoAna.exe the script can also be executed via toolbar also when a measurment is already open in normal Analyzer
- Enter additional parameter: Additional parameter defined what should be done when pressing the toolbar button.
/S= defines the script to be executed (/S=Doku)
/U= defines the user to be used for execution (/U=FS)
Icon: Select icon to be displayed in toolbar
Shortcut: Select shortcut to execute toolbar button via keys
- Program parameter: The following parameters must be set for correct execuition of script via toolbar
Use measurement parameter
Full Pathname
Single run / each measurement: Enables the execute script for every in WinARace selected measurement
Wait for termination: Ensures that at execution the script is executed to mulitple measurements one after another
Save: Save toolbar button settings
Execute script via WinARace toolbar
Select measurements the script should be executed on in WinARace
Press respective WinARace toolbar button to start execution
Wait until execution is finished
Via AutoCalc Routine
A script can also be executed automatically after each measurement download by using CalcTool and AutoCalc routine.
For this the CalcTool Execute command is used.
Create new CAL-File in Software folder
Insert following line and adjust parameters /S=Doku, /U=FS
Execute(AutoAna.exe, /S=Doku, /U=FS, <EventDir>\<MesName>)
Open AutoCalc routine and add created CAL-file routine
Execute AutoCalc routine for testing
Example
At a script at first a CAL file calles 2D_ThrottlePerLap.CAL should be executed. The created channels are part of a MinMax table called Speed which then should be exported as CSV file to Event directory.
Preperation:
Executing 2D_ThrottlePerLap.CAL from directory 2DCalFiles to have channels available in current measurement
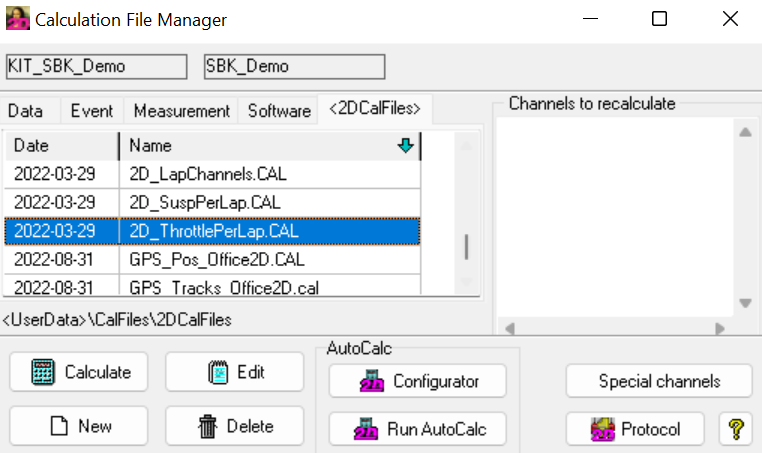
Executing 2D_ThrottlePerLap.CAL
Adding 2D_ThrottlePerLap.CAL channels to MinMax table Speed
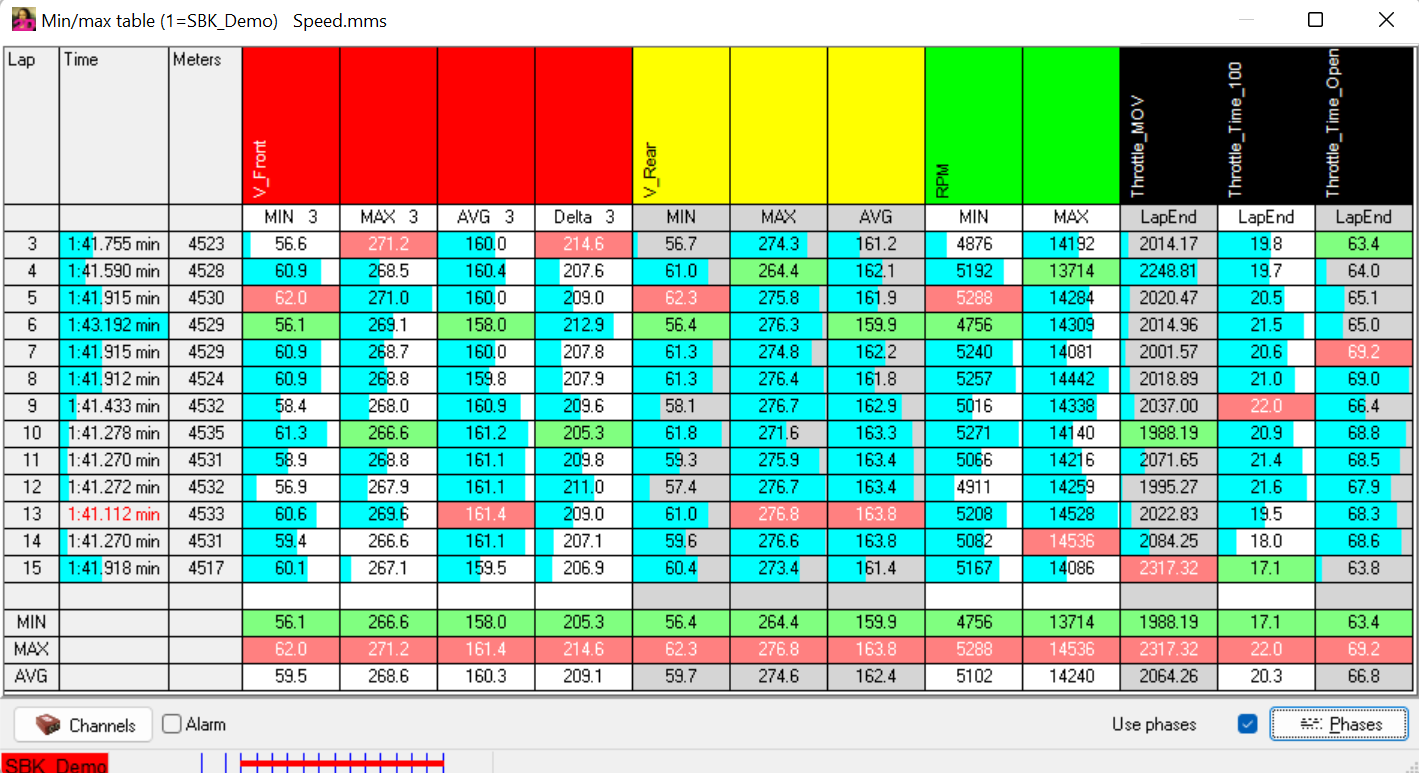
Adding channels Throttle_MOV, Throttle_Time_100 and Throttle_Time_Open to MinMax table Speed
Export settings:
Opening MinMax table setting via right-clicking and sub-menu option Export

Export settings MinMax table
Attention
When using MinMax table export via script only the fields Type, Seperators and Export to file are important!
Type: Chosing file type for export file
Seperators: Selecting list and decimal seperators for exported file
- Export to file:
Append file if existing: When at export in directory to export a file with same name specified in export settings is found, this file is used also used for current export (otherwise new file with extension (…) is created)
Insert lines (at bottom): At file with same name, the new lines are inserted at bottom (otherwise new file with extension (…) is created)
Fill all lines for PowerBI: All lines (event and measurement names fields) are also filled.
Save export settins with small button in bottom bar of MinMax export settings window
Create new script and add first action to script
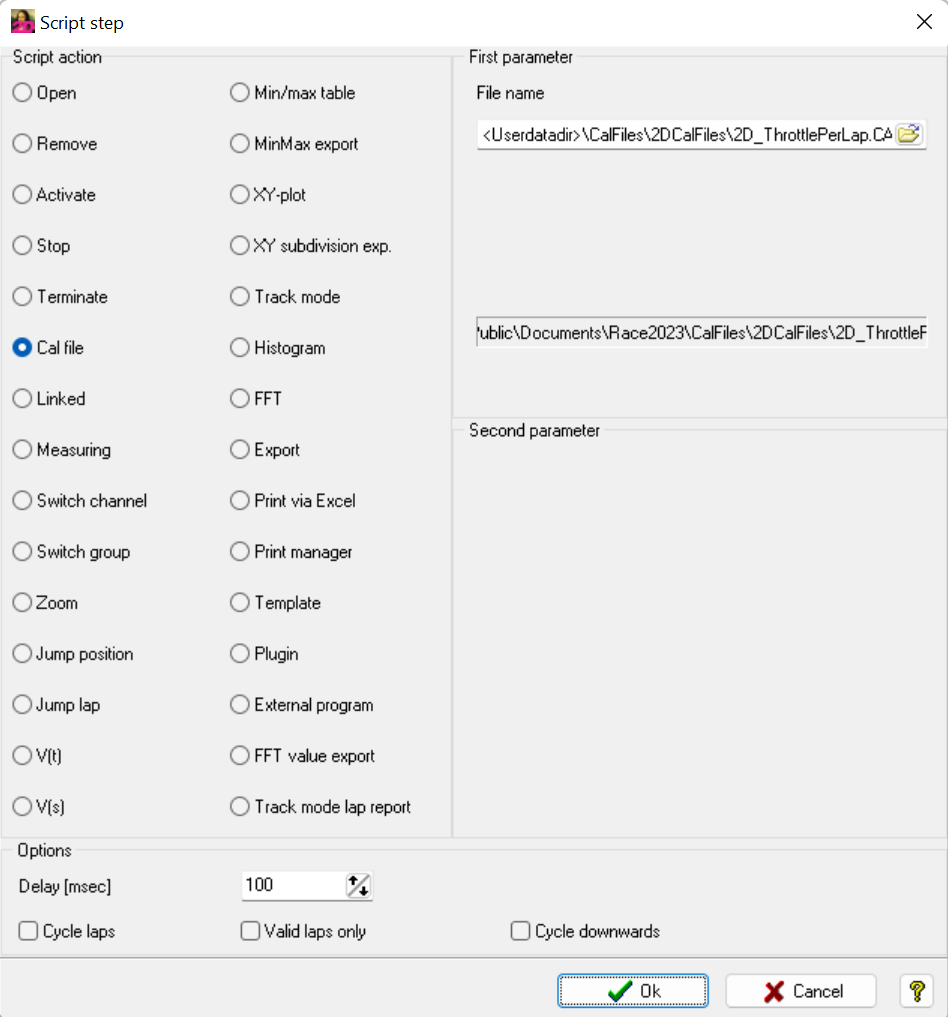
First script action: Executing CAL-File from 2DCalFiles folder (at best use placeholders)
File name:
<Userdatadir>\CalFiles\2DCalFiles\2D_ThrottlePerLap.CAL
Add second action to script
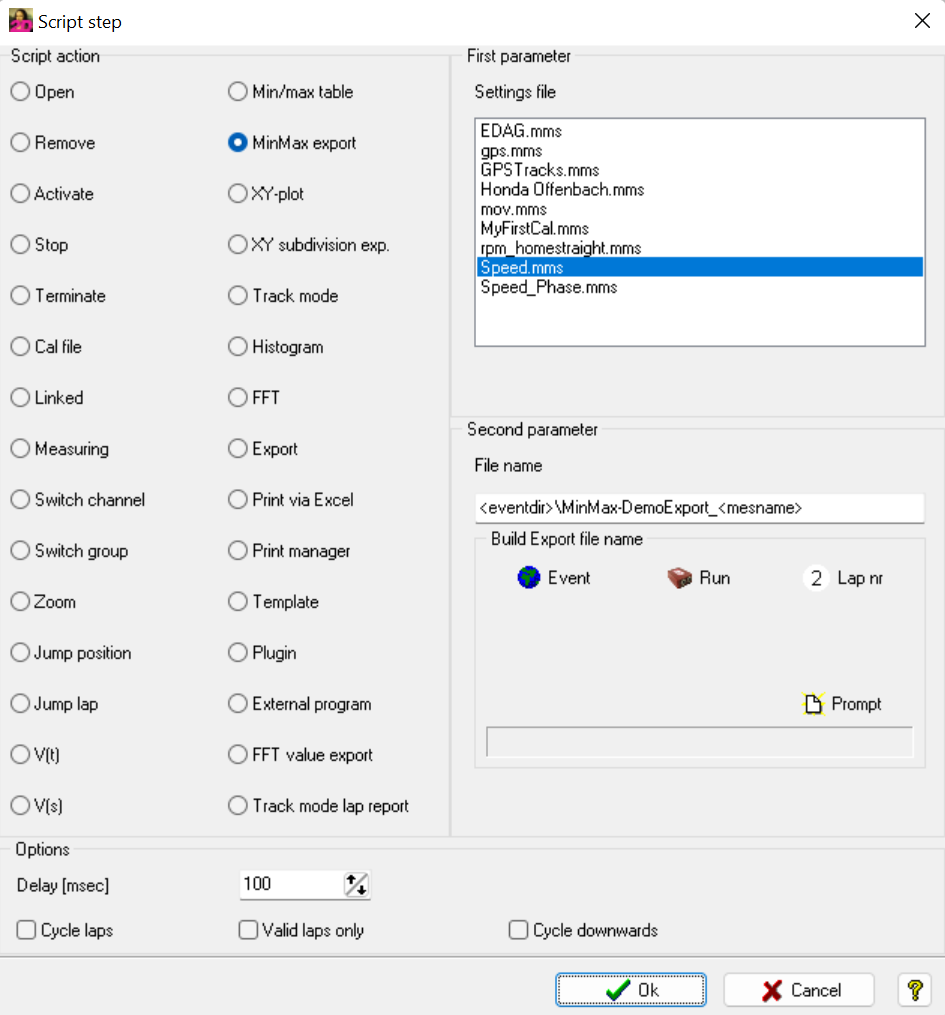
Second parameter
Exporting MinMax table Speed to Event directory (<EventDir>) with name MinMax-DemoExport_<MesName>
<eventdir>\MinMax-DemoExport_<mesname>
Attention
<EventDir> is also used as default directory and has not be specified additionally in this call!
Attention
Every path can be set as export directory here!
Attention
When path contains space characters, it suggested to use “<Path>”.
Execute script
Check created file MinMax-DemoExport_SBK_Demo.CSV in Event

MinMax-DemoExport_SBK_Demo.CSV in Event
Created Script can now be executed for every available measurement!